


Tired of juggling multiple pans just to get dinner on the table? A wok pan steps in as the ultimate problem-solver for fast, versatile cooking. With its deep, rounded shape and high sides, it’s designed to handle everything from quick stir-fries to steaming, frying, and even simmering, all in one place. The unique design distributes heat evenly, helping ingredients cook quickly while locking in flavour and texture.
Kitchen Appliances
A Guide to Choosing the Best Kitchen Knives: Types, Materials and Maintenance
Have you ever dreamed of becoming a professional chef? Having their cooking knowledge and skill set requires a lot of practice and suitable equipment. Kitchen knives are just a part of that equipment that’ll help you grow and learn faster. Even if you don’t aspire to be a chef, every household should have a high-quality knife set.
It’s the kind of long-term investment that makes your prep and cooking time faster and easier. But every knife is not the same. Each of them is crafted and designed for a special purpose from a particular material.
Types of Knives
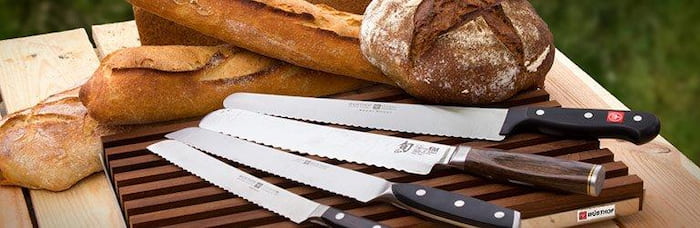
Bread Knife
This is one of the most commonly used knives in the kitchen. You should buy high-quality kitchen bread knives with serrated edges specially created for making a clean cut through the bread. Because of its construction, it doesn’t compromise the bread’s structure, doesn’t pull it apart, and makes you squish it while cutting through. It works by grasping the food, thus preventing any damage. As the name suggests, you can use it to cut bread, but that’s not its only purpose.
You should move it like you would a saw, without applying pressure. The blade itself is enough. It goes well with other baked products like cake as well as fruits and vegetables like melons and bell peppers. You won’t damage the food’s interior because of the sawing technique you’ll use. It can be challenging to maintain and keep a bread knife sharp because it needs a special sharpening tool, but given all the uses it has, the work is worthwhile.
When it comes to cleaning and maintaining, you should be careful if you want to prolong the lifespan of your kitchen bread knives. Wash them immediately with soapy water and a soft cloth after every use. Oftentimes, sponges can damage the knife’s surface. Always make sure the knife is dry before placing it back into the drawer or the knife block. Sharping this knife can be tricky. That’s why many people take them to professionals that have special sharpening tools. This way your knife won’t get damaged or broken.
Chef’s Knife
The star of the show is the chef’s knife, also referred to as a cook’s knife. According to many chefs, you should feel it like an extension of your arm. The average length of these knives is 20-25cm, but if that’s not comfortable for you, you can find knives with a length of 15cm or even 35cm.
This depends on your personal preferences, knowledge and experience you have in the kitchen. The blade is curved with a round tip. That’s why you may need some time to get used to it. But once you get the hang of it, you’ll see how versatile and useful it can be.
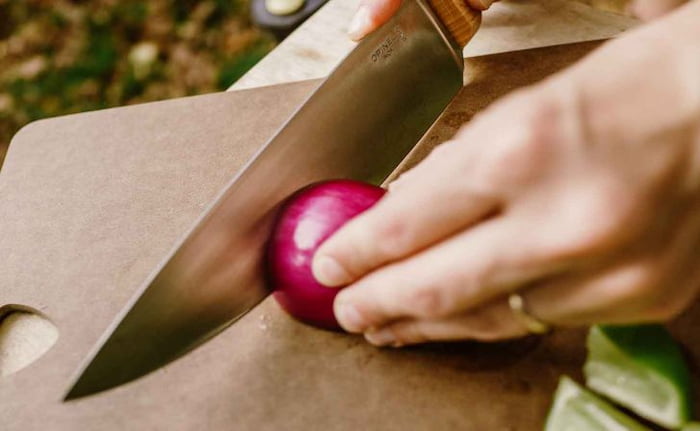
Due to its versatility and ability to handle practically all of the meal prep, a chef’s knife is a top choice. All of the fruits, vegetables, herbs, and meats can be chopped, minced, or diced with it. As soon as you get accustomed to its weight and balance, you’ll become much faster and more efficient. Don’t use it on small produce. Its size won’t allow this.
Paring Knife
This is the chef knife’s younger brother. It’s shorter but still handles the same tasks. The normal size for a paring knife is 9 cm, and the blade is shorter yet extremely sharp. Its length makes it very accurate for trimming meat, peeling produce, slicing vegetables and cheese, chopping berries, garlic, and citrus, deveining shrimp, or even removing seeds.
Avoid using this knife on hard vegetables like carrots, beetroot and pumpkin, because it may break. It isn’t heavy enough to cut through these foods with ease, and if you attempt, you’ll exert unsafe pressure by tightening your grasp and pushing harder. This is dangerous and can lead to injury.
Utility Knife
Just as the name implies, these knives are very functional. You’ll be blessed to have them in your set. They’re versatile, capable of doing practically anything, and come at around the same size as a chef’s or the paring knife. You can find them as serrate, just as kitchen bread knives or in a straight-edged version. Both are 15 cm long. These work well for slicing sandwiches, opening bags and packages, and chopping up herbs, onions, soft meats and veggies. They truly are “knives of all trades,” as chefs like to say.
Boning Knife
This knife is great for deboning meat and leaving almost no waste at the same time. By slicing through connective tissues and joints, it makes deboning a simple task for anything from a 7cm anchovy to a 50kg side of pork. It’s thin, narrow, flexible and with a sharp tip, making it perfect for all the curves of the meat. You can also find a stiff version that can help you cut through the separated meat pieces.
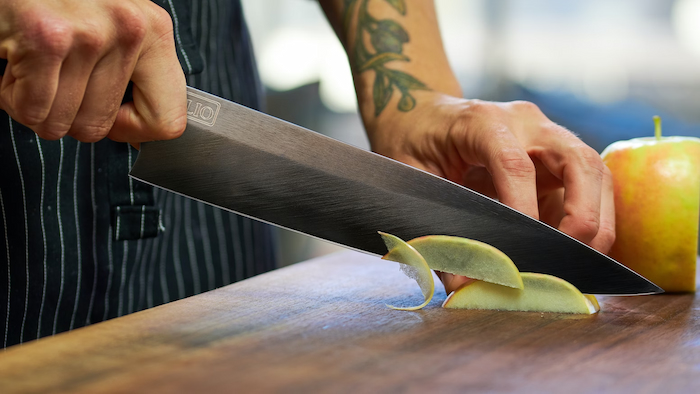
Carving Knife
A carving knife is ideal for making tidy, accurate thick or thin cuts of beef, pig, or roasted turkey. It’s taper to a tip and is long and slender. The meat slides off it and doesn’t adhere to the blade thanks to its indentations. This knife is essential to have in your set of cooking knives especially if you’re a fan of roasting and barbeques.
Materials
Stainless Steel
Stainless steel is the most common material for knives. It’s the kind of material that’s resistant to rust and corrosion, and is sturdy and long-lasting. Moreover, it’s also a rather affordable option so it’s everything you could want in a knife material. The main drawback is that kitchen bread knives or any other type made of stainless steel need to be sharpened regularly.
Ceramic
Many cooks favour this kind of knife since it’s not metal and it’s extremely light yet at the same time sturdy enough. They are thought to be cleaner than metal knives, which is another benefit. You can also have a personalised set of knives because many manufacturers print different patterns and colours on them. Still, they’re very fragile and just one drop might chip or break them. The sharpening is another matter. Knives made of ceramic cannot be sharpened with a standard whetstone. Instead, you’ll need a special tool.
Titanium
How can you tell if a knife is good quality? If you see titanium on it. Titanium is a fantastic material for kitchen knives because it is one of the toughest metals on earth. It withstands rust and is not magnetic. Knives made of titanium are extremely resilient and, with proper care, will survive for a very long time.
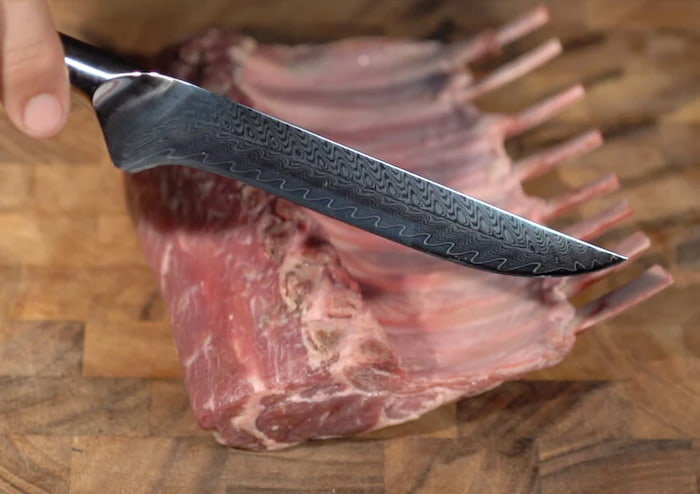
Damascus Steel
These knives typically have a wavy design and are made from two different types of steel mixed and forged together. They’re long-lasting, sharp, and won’t break easily, making them perfect bread knives. That’s why they’re a fantastic option for busy chefs and big families.
Types of Handles
Plastic
These handles are almost always smooth and don’t have any holes to collect dirt. For a firmer grip, certain plastic handles are a little textured. Just remember to keep them away from heat because they melt easily.
Wood
Wood is the first material used on handles and it’s still in play these days. The handles made purely from wood need oiling from time to time with a dedicated handle oil. Nowadays, you can find wood handles coated with see-through plastic in order to avoid damage. When you wash these handles, don’t leave them too long in the water.
Chef Uniforms: Step Up Your Culinary Game with the Right Attire
The uniforms that you wear to work can have a huge impact on your productivity, affecting from the way you feel to how well your work is done. When they’re appropriate for the profession, they help workers identify themselves as professionals and take pride in their appearance. They also reflect a company’s brand or values, which can boost morale and motivate employees.
Step Up the Serving Game of Your Food Business with Wooden Cups
People nowadays are constantly on the search for options which are an upgrade of things they used in the past, many of which are harmful to the environment and the users themselves. Knowing this, it should go without saying that being able to provide your customers with something safe and health-beneficial like wooden cups, for example, can mean a lot to them.
This type of cups has been used since ancient times mainly because of wood’s incredible properties and even today, a great number of people prefer using them on a daily basis. Speaking from a commercial point of view, you can benefit a lot (money wise) from investing in wooden cups wholesale as the price when buying that way is much lower. Additionally, when doing it online, the amount of money you save can double as usually the online prices of all types of products are much lower than the ones in offline stores and the same goes for the wooden cups wholesale option. Well, this is just some of the many reasons why investing in wooden cups for your food business is a great option. Let’s find out more.
Outdoor Cooking Equipment: Steps to Building the Ultimate Camp Kitchen
Cooking in the great outdoors is truly a unique experience. There’s something satisfying about with whipping up a tasty meal with only limited resources on your disposal. But that doesn’t mean your menu has to consist only of sausages on a stick, roasted marshmallows or the usual campfire meals. With the right outdoor cooking equipment, there’s no limit to the delicious recipes you can try! If you’re heading out on a camping trip, here’s a step by step guide to all the cooking gear you need.
The Case of a Coffee Mug: Get Your Daily Caffeine Fix in Style
I hate mornings. I so honestly do, even though I enjoy the morning freshness, first sun rays and the deafening silence. But, when my alarm clock goes on with its squeaky sound and interrupts my dreaming all of a sudden, everything turns black. It’s the time of the day when it’s best that no one approaches anyone. And in that condition, all sleepy with eyelids half closed, I move to the kitchen like a zombie and look for my coffee.

Now, while preparing coffee is one thing, putting it in the right coffee mug is another. Just after me hating mornings, is me hating drinking coffee in a mug that’s not mine.
Everyone has their own coffee mug. I have three, to be exact. One small for morning coffees with a quote on it. It’s not an inspiring one, but something that represents my Monday desire to bring the weekend back. It kind of stimulates me to work my ass off during the week and plan the weekend right, so it’s so good I actually want to live through it again. My second mug is a little bigger and definitely wider, and serves for my midday coffee when I need an energy boost. That one has a rather suitable quote on it and a nice coffee-loving design. And my last one is a gift from a dear friend and it’s more like a tea mug, but I use it for coffee when I need a really large and strong dose of it.
Why You Should Consider Buying Stemless Wine Glasses
To really enjoy wine, everyone who is a wine lover knows you need a really great glass. Anyone who drinks wine or knows the basics, knows that the wine glass can really have an effect on the taste and experience you have while drinking it. The wrong wine glass can really make or break the wine and the taste itself. While wine lovers could probably bicker all day over which glass makes wine taste and smell better, we are going to go over everything you need to know about the stemless wine glass. Finding the right glass for you really comes down to experience, so trying a stemless one makes sense. They have certainly become more popular over the years and you can easily buy stemless wine glasses almost anywhere.
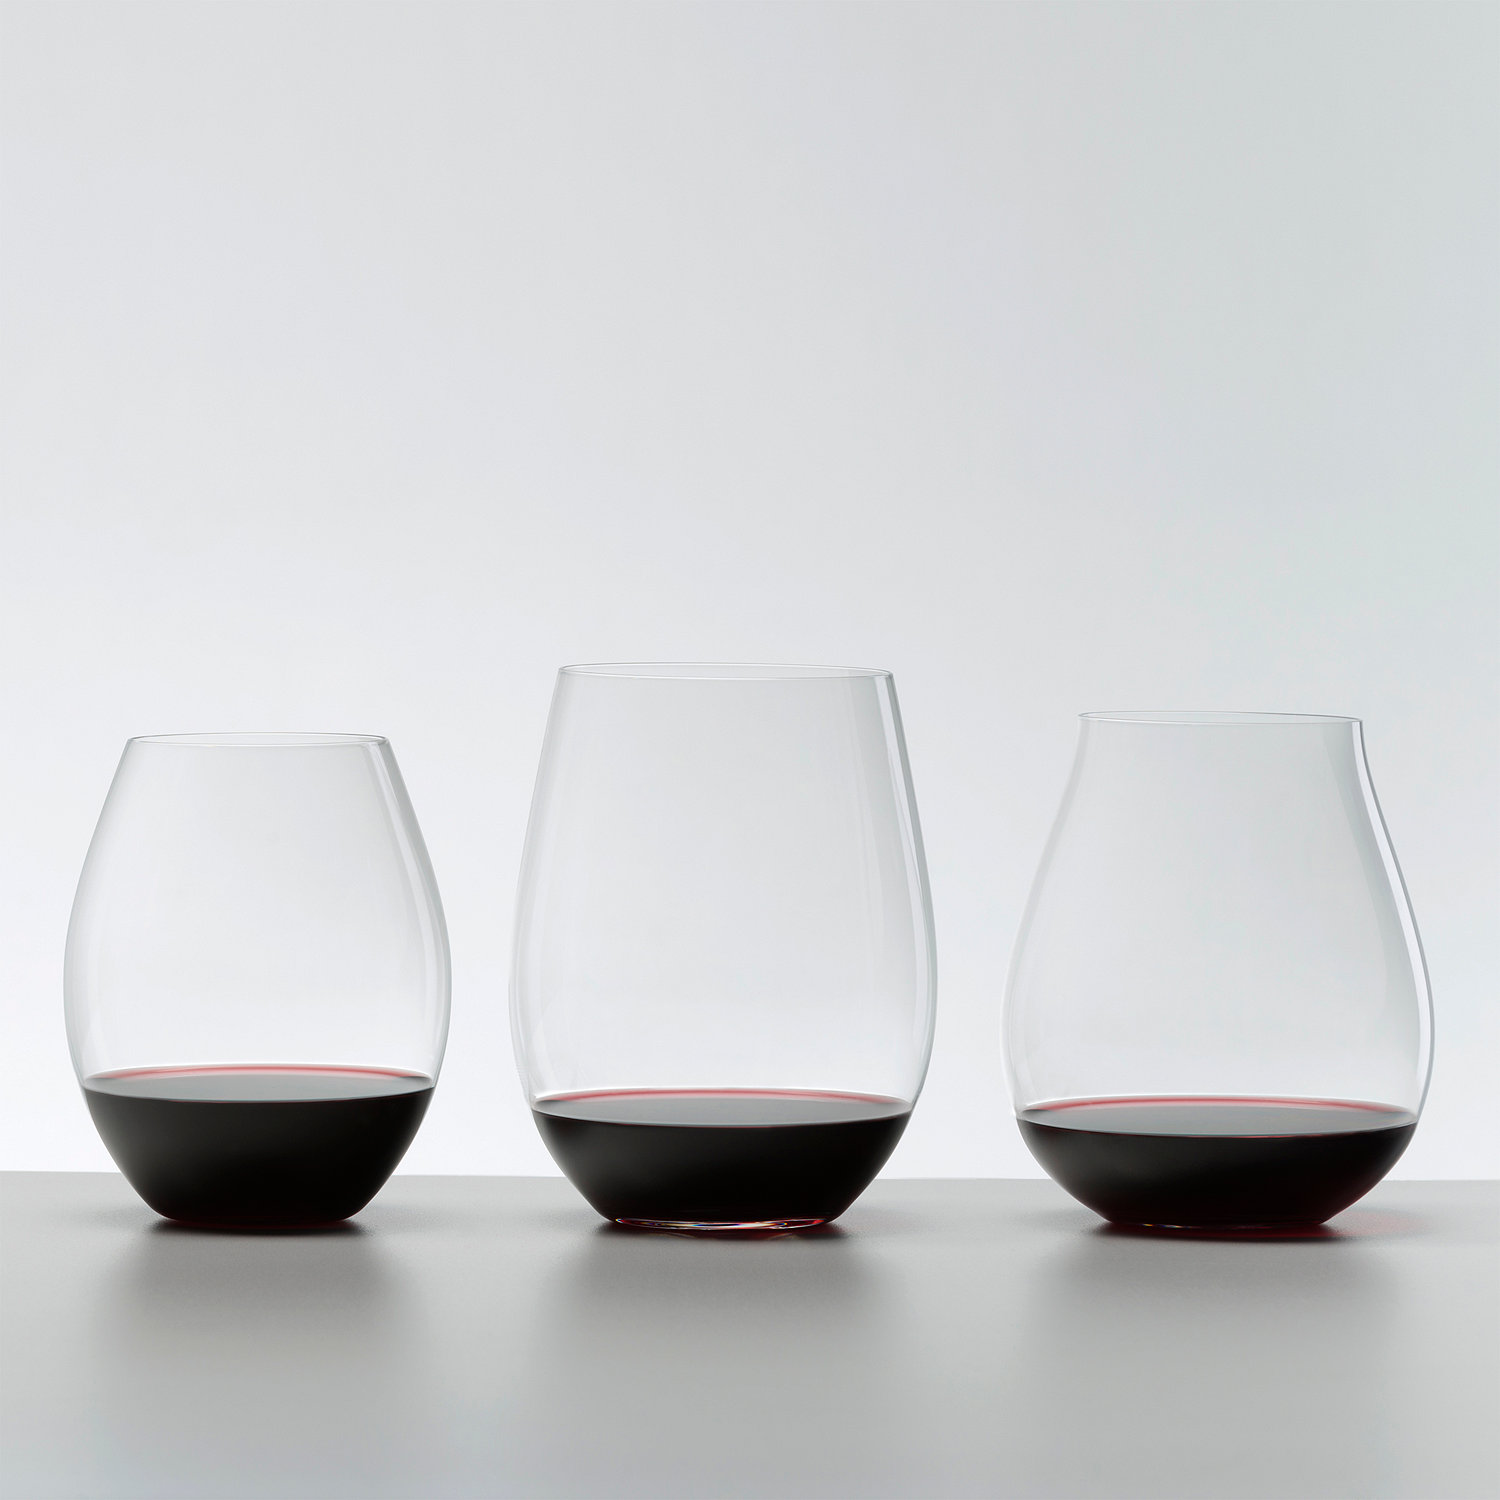
These glasses were certainly a little bit controversial when they first came out and most wine connoisseurs thought they were a bit of a joke. Of course, after some time even the biggest wine snobs started to come around once they realized what kind of benefits you can get from drinking out of a stemless glass. Now you might even mistake these for a regular glass, but once you get a close look, the appearance is quite different. They are not as thick as a regular glass and have been designed to really bring out all the different flavours that wine has to offer.
Now for some of you newbies out there, you have to understand that the design of the glass isn’t just so it can look pretty, it does actually have a purpose. Both the stemless and stemmed wine glasses have reasons for being designed the way that they are. The stemmed kind of glass is meant to keep your hand away from the glass so you don’t warm up wine that is meant to be served chilled. The stemless variety if obviously not designed for the same reason. Your hand is wrapped around the glass or on the bottom so this kind of glass has been designed for room temperature wine or warmer wines for winter. Of course, you can still enjoy chilled wine in this glass, you just want to make sure to throw some frozen grapes in there to keep it cool.
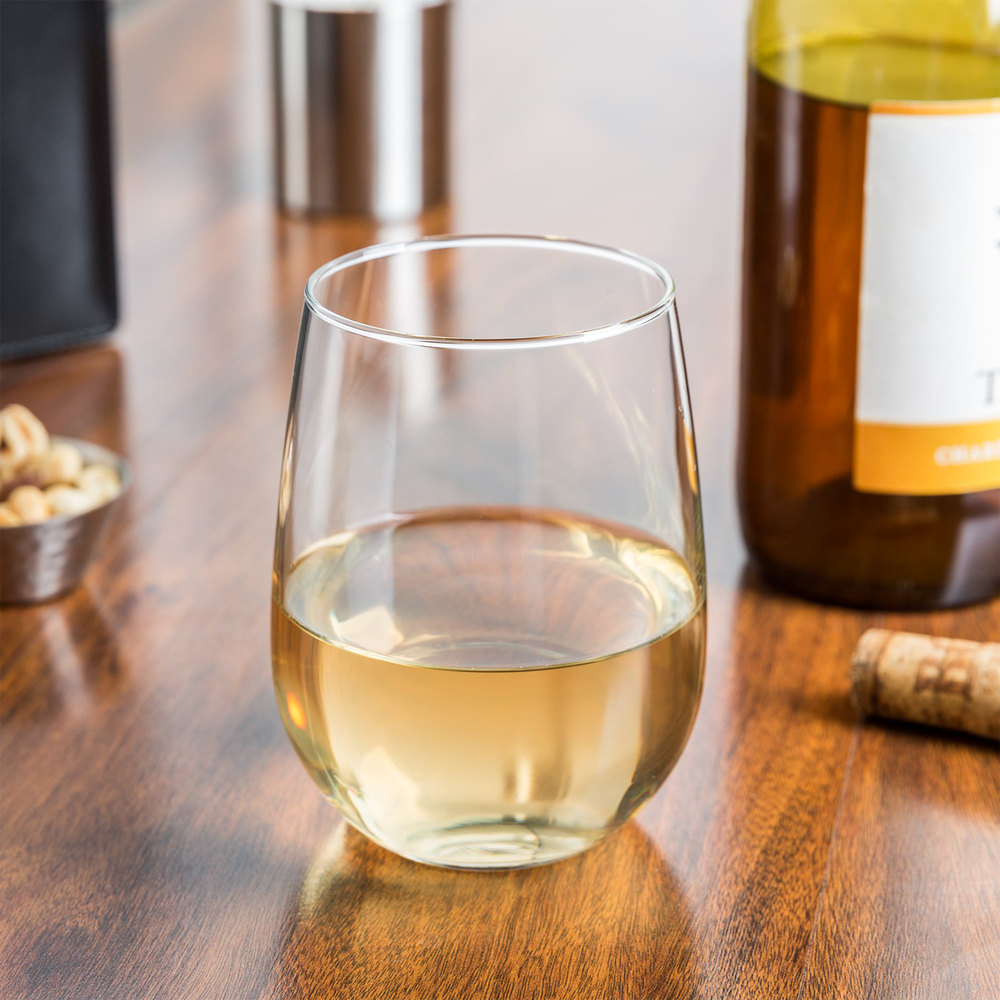
A few of the benefits you might receive when you choose a stemless wine glass is first and foremost stability. Tall wine glasses are known to spill quite easily but this doesn’t happen with the stemless wine glass which makes it a great option if you want to keep your white couch safe. They are also easier to store and handle because they take up a lot less space, unlike a traditional wine glass. Last but not least, you can use them in any setting you like being it formal or casual because they really do look great. If you are someone who wants to try something new with your glass of wine then you should consider buy stemless wine glasses for your daily glass of red or white.
Step-By-Step Guide on How to Find The Right Juicer For You
As the online market is becoming more and more abundant with different products every day, choosing the right juicers online has become a challenging task. All retailers offer different reasons why you should opt for a certain type, including the speed, effectiveness, easy maintenance, price and quality of the juicer. Knowing the different types of juicers available on the market, their detailed specifications as well as pros and cons might truly help you shape your decision around your genuine needs and budget limits.

Centrifugal Juicers
These are the most widespread types of juicers and are known for their ability to exhibit great speed and produce juice in a time-saving manner. Another good aspect of centrifugal juicers is their inexpensiveness. However, as you might be starting to think, they do sound too good to be true. Unfortunately, these juicers do not produce the juice our bodies can truly benefit from. This is a result of the high speed that causes oxidation which in return causes loss of some essential vitamins and fiber. After using a centrifugal juicer for a few days, many people notice that only 3 seconds after the juice has been extracted, instead of being creamy and homogeneous, it separates itself into a porridge-like substance and water.
Twin-Gear Juicers
These juicers feature two gears that interlock and produce juice by pressing one against each other. If your juicing routine consists of mixing many different pieces of fruits and vegetables, than this is the right juicer for you. However, if you plan on making juices from one ingredient only, for instance, a different 100% freshly squeezed juice every morning, you should probably look elsewhere. This is because according to experienced critics and professionals in the field, twin gear juicers are not specialized for that purpose. It is no lie that twin-gear juicers can be quite an investment, but they are worth it since they do produce high-quality juices due to the low level of oxidation.
Masticating Juicers
Masticating juicers are the closest to chewing that juicers can get. Although they are not really that slow, but just a fraction slower when compared to the centrifugal juicers, the benefits of masticating juicers are endless. There is no oxidation whatsoever and the juice you get is abundant in vitamins and fiber, ready to instantly energize your body. Plus, there is no juice division. Due to the high percentage of naturalness included, these juices have a longer shelf life and are the perfect nutritional boost your body can thrive on during the day.
To conclude, choosing the right kind from the whole range of juicers online, seems like an easier task when you know what you are looking for; whether you prefer speed over juice quality and shelf life, or you want to minimize the level of oxidation and get the most of the fruits and vegetables, the choice is totally yours. After getting informed about juicers, it is quite reasonable to choose the most natural option, even though this may mean cleaning few more parts and spending a few more bucks. You can find all the above-mentioned types of juicers online or in a local kitchen appliances store and save yourself time talking to the staff and deciphering the specifications on the label when you already know what fits your needs best.
How To Install Gas Cooktop: Simple Step-by-Step Guide
A modern and functional kitchen is the one that gives you the opportunity to master your culinary skills, while offering unique feelings of fun and pleasure at the same time. To have the kitchen of your dreams, you need to make sure you dispose with the right cooking equipment and appliances. Apparently, one of such ‘tools’ is the gas cooktop.
Gas cooktops are energy-efficient and cost-effective – the two prevalent features that usually determine the buying decision of the interested shopper. Cooking with a gas cooktop ensures a great cooking experience with an excellent control over the cooking temperatures, which is surely a big “YES” for novices in cooking. If you are a potential buyer, take a look at the following steps on how to install your brand new gas cooktop properly, quickly and without effort.
Step 1: Turn off the gas
Before you even buy a gas cooktop, you need to confirm that you have the right power source. Obviously, it needs to be gas. Make sure the gas supply is turned off. To do it so, you need to find the valve of the gas-supply pipe that is usually coming out of the wall, then turn the valve in the direction for ceasing the gas supply (closed position).
Step 2: Let the ‘hidden’ gas out
Although you have shut off the gas supply, know there is still a small amount of gas trapped in the pipe that connects the valve to the gas cooktop. Do not neglect this information, because even the smallest amounts of gas can cause an explosion or fire that may lead to property damage, personal injury and even death. Therefore, to safely get rid of the ‘hidden’ gas, you need to unplug the power cord, then turn-on the burners for a few seconds. This is how you will release the so-called ‘trapped gas’ and avoid a disaster.
Step 3: Remove all the obstructions from the countertop
The cooktop needs to fit properly into the countertop, so your next task is to adjust or remove everything that may be a possible obstacle for proper gas-cooktop installation. In most cases, there is an ‘intruding’ or ‘extra’ material that needs to be cut off so that the cooktop can nicely fit into the kitchen countertop.
Step 4: Reconnect the gas supply to the cooktop
Connect the gas-supply pipe to the cooktop, then check for gas leaks at both cooktop and piping. Make a professional ‘gas-leak check’ by using a special device, called combustible gas analyzer. This will ensure that you have perfectly done the job and you are ready to start using your new gas cooktop.
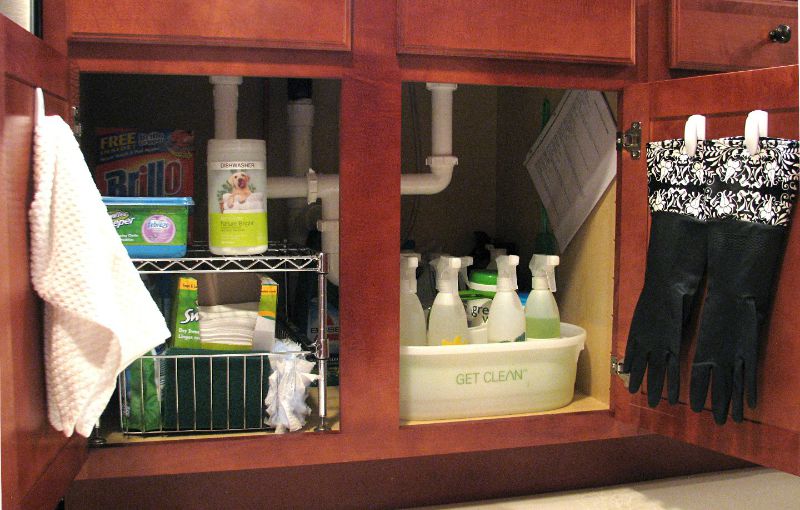
Organize Under Your Kitchen Sink In Few Easy Steps
What’s the worse thing about cleaning kitchen? If your answer is the clutter under your kitchen sink cabinet, we hear you. That area often resembles a fraternity house after a party rather than a storage place.
When it comes to organizing the cabinet under your kitchen sink, one of the biggest problems is having too much stuff in a small space; a place where things are just getting jammed inside and you can’t find what you need, when you need it.
Following are few easy steps that will help you organize under your kitchen sink and keep only the things you really need to clean the kitchen and few other things.
- Install a slide-out drawer – Available in various types and models, try to choose a gliding drawer with a water resistant finish, so it can stand up to any moisture that may occur under your kitchen sink. When measuring, do not forget to leave clearance for the pipes and hoses from the sink. Easy to install, gliders will allow you to pull supplies out, and reach them easily.
- Use cabinet inserts to double your storage – A small, elevated shelf is a great thing that you can use to maximize the vertical space of your under kitchen sink cabinet. Choose one tall enough to place bottles underneath or boxes or anything that can be ruined if leak occurs.
- Install a small curtain rod under your sink – For an instant organization, install a small curtain rod under your sink and use it to suspend all your spray bottles. If you don’t have too many bottles, a heavy-duty tension rod should be sufficient. For heavier loads, opt for a screw-mounted model. You can add labels to the back of each bottle to make easier to see what’s what.
- Use coffee cans or plastic storage box to stop rolls of trash bags from unraveling under your kitchen sink – Cut a hole in the top of the plastic box and pull the bags through one at a time. If you tend to buy coffee by the can, simply cut a slit in the top of the can lid and pull the bags through.
- Consider a rotating solution – Place a rotating solution in your under-sink cabinet and organize you bottles and cans on it. Next all you will need is to spin your supplies around to find what you need.
Try one of these easy steps and really transform your under-sink storage. Which one will work best for your space? Consider the size of your under-sink cabinet and the things that you really need to keep in there. This will help you choose a solution that will suit your needs the most.
RECENT POSTS


